 Modern web browsers allow us to access connected media devices like microphones, cameras, and screens through MediaDevices interface. Since Electron uses chromium and Nodejs,
MediaDevices devices API is supported out of the box. Electron’s desktopCapturer module provides access to media sources that can be used to capture audio and video from the renderer process.
Modern web browsers allow us to access connected media devices like microphones, cameras, and screens through MediaDevices interface. Since Electron uses chromium and Nodejs,
MediaDevices devices API is supported out of the box. Electron’s desktopCapturer module provides access to media sources that can be used to capture audio and video from the renderer process.
In this tutorial, I’ll show how to build a snipping tool using desktopCapturer module. We’ll use React for building our application’s user interface and Nodejs as a backend server for uploading snipped images.
Structure
A few months ago, I wrote a Hacker News app with React and Electron. It was my first Electron app. I’m going to follow the same directory structure. Here’s what it’s gonna look like.
|
1 2 3 4 5 6 7 8 9 10 11 12 13 14 15 |
app build # Webpack output directory src main components # React components res # Resources (logos, images etc) snips # Directory for storing snips app.js # Electron Main process index.html # Bootstrap React App release # electron's generated app installer and binary server # Express server for uploading files webpack dev.config.js # webpack config for dev env prod.config.js # webpack config for prod env package.json # you know why |
Getting Started
Let’s start off by creating app.js and index.html file inside app/src/main directory. app.js will run the main process and display index.html inside BrowserWindow. There’s a lot of boilerplate code in this file. I’m only focusing on the part where we create our main BrowserWindow. You can view the complete code in the linked repository.
|
1 2 3 4 5 6 7 8 9 10 11 12 13 14 15 16 17 18 |
function createWindow() { mainWindow = new BrowserWindow({ width: 400, height: 200, icon: path.join(__dirname, '/res/images/logo.png'), frame: false, }); mainWindow.setMenu(null); mainWindow.setResizable(false); // and load the index.html of the app. mainWindow.loadURL(url.format({ pathname: path.join(__dirname, 'index.html'), protocol: 'file:', slashes: true, }) + '?main'); } |
There’s no rocket science here. We’re creating a new browser window, removing its menu and frame and loading our index.html. I would like to point one important line of code here. I’m concatenating + '?main' at the end of our formatted URL. I was looking for a way to pass additional information to BrowserWindow and then retrieve it from renderer process and this seems to be the only way to I found. I’m sure there must have been a better way to do it. if you know one, please share in comments. We’ll render two main components in our BrowserWindow, a Snipper and a Cropper. I didn’t want to create different HTML files for rendering different components. By passing additional info, we can choose which component to render.
Add this code to index.html file.
|
1 2 3 4 5 6 7 8 9 10 11 12 13 14 15 16 17 18 19 20 21 22 23 24 25 26 27 28 29 30 31 32 |
<!DOCTYPE html> <html lang="en"> <head> <title>Snipper</title> </head> <body> <div id="root" class="h-100"></div> <script> { if (process.env.NODE_ENV) { const bundle = document.createElement('script'); const port = 9000; bundle.src = 'http://localhost:' + port + '/app.bundle.js'; document.body.appendChild(bundle); const devServer = document.createElement('script'); devServer.src = 'http://localhost:' + port + '/webpack-dev-server.js'; document.body.appendChild(devServer); } else { let headHTML = document.getElementsByTagName('head')[0].innerHTML; headHTML += '<link type="text/css" rel="stylesheet" href="css/main.css">'; document.getElementsByTagName('head')[0].innerHTML = headHTML; const bundle = document.createElement('script'); bundle.src = 'app.bundle.js'; document.body.appendChild(bundle); } } </script> </body> </html> |
We’ve configured Webpack to start a dev server and enable hot reloading for development builds. We’ll conditionally render script and styles tags DOM based on the environment. You can view Webpack’s dev and prod config files in the linked repository.
Render
Let’s create root App.js component inside src/main/components directory. It doesn’t do much. It renders a child Snipper component and mounts.
|
1 2 3 4 5 6 7 8 9 10 11 12 |
import React from 'react'; import ReactDOM from 'react-dom'; import Snipper from './Snipper'; const render = (Component) => { ReactDOM.render( <Component />, document.getElementById('root'), ); }; render(Snipper); |
Snipping Component
Our Snipper component will look like this.
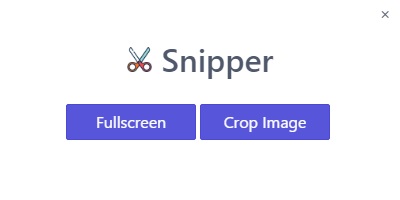
We’re rendering a logo, title and button control for capturing a full screenshot and creating an image cropper. Add this code to your Snipper.js component file.
|
1 2 3 4 5 6 7 8 9 10 11 12 13 14 15 16 17 18 19 20 21 22 23 24 25 26 27 28 29 30 31 32 33 34 35 36 37 38 39 40 41 42 43 44 45 46 47 48 49 50 51 52 53 54 55 56 57 58 59 60 61 62 63 64 65 66 67 68 69 70 71 72 73 74 75 76 77 78 79 80 81 82 83 84 |
class Snipper extends React.Component{ constructor(props){ super(props); this.state = { view : this.getContext() }; } render(){ return( <Fragment> {this.state.view === 'main' ? ( <Fragment> <div className="snip-controls text-center"> <span className="close" title="close" onClick={this.destroyCurrentWindow.bind(this)}>× </span> <div> <h2> <img height="25" src={require('../res/images/logo-big.png')} alt=""/> Snipper </h2> </div> {!this.state.save_controls ? <div> <button className="btn btn-primary mr-1" onClick={this.captureScreen.bind(this, null)}> Fullscreen </button> <button className="btn btn-primary mr-1" onClick={this.initCropper.bind(this)}> Crop Image </button> </div> : <div> <button className="btn btn-primary mr-1" onClick={this.saveToDisk.bind(this)}> Save to Disk </button> <button className="btn btn-primary mr-1" onClick={this.uploadAndGetURL.bind(this, null)}> Upload URL </button> <button className="btn btn-primary mr-1" onClick={this.discardSnip.bind(this)}> Discard </button> </div> } </div> {this.state.image && <div className="snipped-image"> <img className="preview" src={this.state.image} alt=""/> </div> } </Fragment> ) : <Cropper snip={this.snip.bind(this)} destroySnipView={this.destroySnipView.bind(this)} /> } </Fragment> ) } } |
Remember we concatenated a string when loading BrowserWindow. We can access it now and set view state with it. Add this method to the component.
|
1 2 3 4 |
getContext(){ const context = global.location.search; return context.substr(1, context.length - 1); } |
We’re dividing Snipper components into two parts. Whenever we’ll load our app from the main process with ?main string concatenated to the URL, we’ll see a Fullscreen and Crop Image buttons.
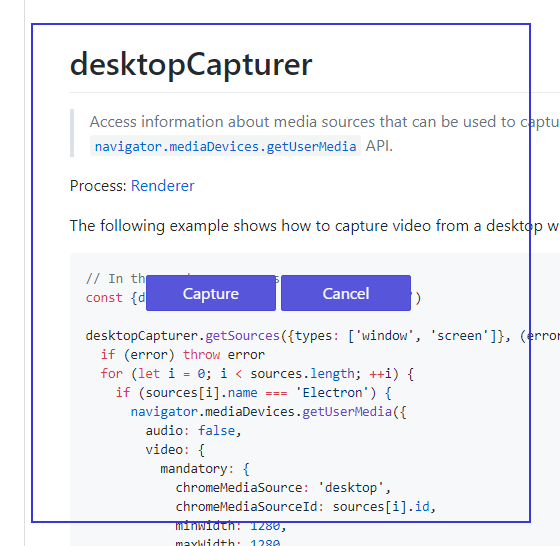
Cropper Component
Our Cropper components will look like this.
|
1 2 3 4 5 6 7 8 9 10 11 12 13 14 15 16 17 18 19 20 21 22 23 24 25 26 27 28 29 30 31 32 33 34 35 36 37 38 39 40 41 42 43 44 45 46 47 48 49 50 51 52 53 54 55 56 57 |
import React from 'react'; import Rnd from 'react-rnd'; const electron = require('electron'); const screenSize = electron.screen.getPrimaryDisplay().size; const style = { display: 'flex', alignItems: 'center', justifyContent: 'center', border: 'solid 2px #3a38d2', margin: '5px' }; class Cropper extends React.Component{ constructor(props){ super(props); this.state = { width: '500px', height: '500px', x: (screenSize.width/2) - 250, y: (screenSize.height/2) - 250 }; } render(){ return( <Rnd style={style} size={{ width: this.state.width, height: this.state.height }} position={{ x: this.state.x, y: this.state.y }} onDragStop={(e, d) => { this.setState({ x: d.x, y: d.y }) }} onResize={(e, direction, ref, delta, position) => { this.setState({ width: ref.style.width, height: ref.style.height, x : position.x, y : position.y }); }} bounds={'parent'} > <div className="rnd-controls"> <button className="btn btn-primary" onClick={this.props.snip.bind(this, this.state)} >Capture</button> <button onClick={this.props.destroySnipView.bind(this)} className="btn btn-primary" >Cancel</button> </div> </Rnd> ) } } |
We’re using react-rnd module. It lets you create a component with drag and resize support and keep track of coordinates and offsets with its onResize and OnDragStop prop callbacks.
So far, we’ve only defined how our Snipper and Cropper components will look how. Now, let’s implement their functionality.
Displaying Cropper
We’ve registered initCropper onClick handler method on Crop Image button. Let’s add it to our component.
|
1 2 3 4 5 6 7 8 9 10 11 12 13 14 15 16 17 18 19 20 21 22 23 24 25 26 27 |
initCropper(e){ mainWindow = this.getCurrentWindow(); mainWindow.hide(); snipWindow = new BrowserWindow({ width: screenSize.width, height: screenSize.height, frame : false, transparent : true, kiosk: true }); snipWindow.on('close', () => { snipWindow = null }); ipcRenderer.once('snip', (event, data) => { this.captureScreen(data, null); }); ipcRenderer.once('cancelled', (event) => { mainWindow.show(); }); snipWindow.loadURL(path.join('file://', __dirname, '/index.html') + '?snip'); snipWindow.setResizable(false); } |
On click, we’re creating a new BrowserWindow with same file URL but a different info string. This time we’re concatenating ?snip to the loadURL file path. In our click handler, we’ll keep a reference to main BrowserWindow and hide it instead of destroying it. We’ll create a new transparent window with full height and width of client screen. To get current instance of BrowserWindow, add this method your component.
|
1 2 3 |
getCurrentWindow(){ return electron.remote.getCurrentWindow(); } |
When our new BrowserWindow loads, it will render Cropper components instead of button controls. We’re also registering event listening with ipcRenderer.once. ipcRenderer is an instance of EventEmitter class and lets us communicate between different windows. We’re registering two events, snip and canceled. We’ll call them from cropper window and listen to them in the main window.
We’re passing two callback prop methods to Cropper component. snip method will be called when a user clicks capture button after cropping a screen region and destroySnipView will be called when a user cancels a crop. Add these methods to Cropper component.
|
1 2 3 4 5 6 7 8 9 |
snip(state, e){ this.getMainInstance().webContents.send('snip', state); this.destroyCurrentWindow(null); } destroySnipView(e){ this.getMainInstance().webContents.send('cancelled'); this.destroyCurrentWindow(null); } |
On snip and cancel, we’ll call snip and canceled events that we registered in our main window before creating the second one. On snip, we’ll pass the current state of Cropper component. It has x and y coordinates and height and width of the cropped region. After calling events and passing the data, we’ll destroy cropper window.
Capturing Screen
We’re listening to snip event in our main window.
|
1 2 3 |
ipcRenderer.once('snip', (event, data) => { this.captureScreen(data, null); }); |
Once we receive data, we’ll call captureScreen method. Let’s define it.
|
1 2 3 4 5 6 7 8 9 10 11 12 13 14 15 16 17 18 19 20 21 22 23 24 25 26 |
captureScreen(coordinates,e){ mainWindow = this.getCurrentWindow(); mainWindow.hide(); this.getScreenShot((base64data) => { let encondedImageBuffer = new Buffer(base64data.replace(/^data:image\/(png|gif|jpeg);base64,/,''), 'base64'); Jimp.read(encondedImageBuffer, (err, image) => { if (err) throw err; let crop = coordinates ? image.crop(coordinates.x, coordinates.y, parseInt(coordinates.width, 10), parseInt(coordinates.height, 10)) : image.crop(0,0, screenSize.width, screenSize.height); crop.getBase64('image/png', (err,base64data) =>{ this.setState({ image : base64data, save_controls : true, }); this.resizeWindowFor('snip'); mainWindow.show(); }); }); }); } |
Inside this method, we’ll retrieve our main window and hide it before capturing the screenshot so that it won’t get in the way. We’re also using jimp module to crop our images. After that, we’re calling getScreenShot method and passing it a callback. It will return us a base64data string after capturing a screenshot. Add this method to your component.
|
1 2 3 4 5 6 7 8 9 10 11 12 13 14 15 16 17 18 19 20 21 22 23 24 25 26 27 28 29 30 31 32 33 34 35 36 37 38 39 40 41 42 43 44 45 46 47 48 49 50 51 52 53 54 55 56 57 58 59 60 61 62 63 64 65 66 67 68 69 70 71 72 73 74 75 76 77 78 |
getScreenShot(callback, imageFormat) { let _this = this; this.callback = callback; imageFormat = imageFormat || 'image/png'; this.handleStream = (stream) => { // Create a hidden video element on DOM let video_dom = document.createElement('video'); // hide it somewhere video_dom.style.cssText = 'position:absolute;top:-10000px;left:-10000px;'; // Load stream video_dom.onloadedmetadata = function () { // Set video ORIGINAL height (screenshot) video_dom.style.height = this.videoHeight + 'px'; // videoHeight video_dom.style.width = this.videoWidth + 'px'; // videoWidth // Create canvas let canvas = document.createElement('canvas'); canvas.width = this.videoWidth; canvas.height = this.videoHeight; let ctx = canvas.getContext('2d'); // Draw video on canvas ctx.drawImage(video_dom, 0, 0, canvas.width, canvas.height); if (_this.callback) { // Save screenshot to base64 _this.callback(canvas.toDataURL(imageFormat)); } else { console.log('Need callback!'); } // Remove hidden video tag video_dom.remove(); try { // Destroy connect to stream stream.getTracks()[0].stop(); } catch (e) {} }; video_dom.src = URL.createObjectURL(stream); document.body.appendChild(video_dom); }; this.handleError = (e) => { console.log(e); }; // Get available screen desktopCapturer.getSources({types: ['screen']}, (error, sources) => { if (error) throw error; for (let i = 0; i < sources.length; ++i) { // Filter: main screen if (sources[i].name === "Entire screen") { navigator.webkitGetUserMedia({ audio: false, video: { mandatory: { chromeMediaSource: 'desktop', chromeMediaSourceId: sources[i].id, minWidth: 1280, maxWidth: 4000, minHeight: 720, maxHeight: 4000 } } }, this.handleStream, this.handleError); // handle stream return; } } }); } |
At the end of getScreenShot method, we’re filtering available screens by iterating over media sources returned by desktopCapturer.getSources. After selecting the main screen, we’re calling navigator.webkitGetUserMedia and passing it two methods to handle captured stream and handle errors. In handleStream method, we’re creating a hidden video tag and drawing it on a canvas, then passing base64 data string to callback method after converting canvas to data URL by calling canvas.toDataURL method.
We have a coordinates param on captureScreen method. When an snip event from cropper window calls captureScreen method, coordinates will be passed to this method as the state. When a user will click Fullscreen button, it will call captureScreen with null coordinates. On null, we’ll capture full main screen. After capturing the image, we’ll update image and set save_controls to true to display Save disk, Upload URL and Discard buttons.
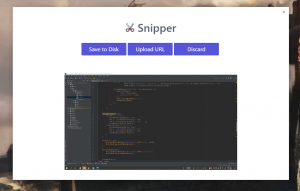
Here’s what it looks like when your click Full screen or select a crop. Now we need to add event handlers to save an image to disk, upload and discard. Add these methods to your component.
|
1 2 3 4 5 6 7 8 9 10 11 12 13 14 15 16 17 18 19 20 21 22 23 24 25 26 27 28 29 30 31 32 33 34 35 36 |
discardSnip(e){ this.setState({ image : '', save_controls : false, }); this.resizeWindowFor('main'); } saveToDisk(e){ const directory = path.join(__dirname + '/snips'); const filepath = path.join(directory + '/' + uuidv4() + '.png'); if (!fs.existsSync(directory)){ fs.mkdirSync(directory); } fs.writeFile(filepath, this.state.image.replace(/^data:image\/(png|gif|jpeg);base64,/,''), 'base64', (err) => { if(err) console.log(err); shell.showItemInFolder(filepath); this.discardSnip(null); }); } uploadAndGetURL(e){ post(this.state.upload_url, { image : this.state.image }) .then((response) => { const res = response.data; if(res.uploaded){ shell.openExternal(this.state.upload_url + '/' + res.filename); this.discardSnip(null); } }) .catch((error) => { console.log(error); }); } |
On discard, we’ll simply remove it from the state, disable save_controls and resize the window. On save to disk, we’ll write the base64 data string to file using fs.writeFile method and then open the file in default file explorer using shell.showItemInFolder method. On Upload, we’ll use axios post method to pass base64 data string to our Nodejs backend server. Let’s create a simple express server to handle a post request, saving file and returning image URL.
Upload Server
Under server directory, create a server.js file and add this code.
|
1 2 3 4 5 6 7 8 9 10 11 12 13 14 15 16 17 18 19 20 21 22 23 24 25 26 27 28 29 30 31 32 33 34 |
const express = require('express') const app = express() const bodyParser = require('body-parser'); const fs = require('fs'); const uuidv4 = require('uuid/v4'); const path = require('path'); const port = 8989; app.use(bodyParser.urlencoded({extended: true})); app.use(bodyParser.json({limit: '10000kb'})); app.use('/upload', express.static(path.join(__dirname, 'uploads'))); app.post('/upload', (req, res) => { const image = req.body.image; const directory = path.join(__dirname + '/uploads'); const filename = uuidv4() + '.png'; const filepath = path.join(directory + '/' + filename); if (!fs.existsSync(directory)){ fs.mkdirSync(directory); } fs.writeFile(filepath, image.replace(/^data:image\/(png|gif|jpeg);base64,/,''), 'base64', (err) => { if(err) console.log(err); res.json({ uploaded : true, filename : filename }) }); }); app.listen(port, () => { console.log('Server running on PORT: ' + port); }); |
We’ll serve uploaded files through /upload route as static content. Inside post callback, we’re creating uploads directory if it doesn’t exist. We’re creating a file with base64 data string and returning the filename. After receiving success response from the web server, we’ll concatenate filename with our static content route and open it in default web browser will shell.openExternal method.
Snipper Demo
Here’s a functioning demo of our snipping tool.
I’ve created a GitHub repository. I’ve tested the code on Windows 10 machine. if you get any errors, please open an issue in repository or mention in comments. Setup instructions are available in repository readme file.
Only darwin can build this project ?
No, you can build it on/for any OSX, Windows or Linux machine.
I failed to try build this on windows 10 and ubuntu1804,because of ‘fsevents@1.2.3’ needs os darwin.
Tested on both Windows 10 and Ubuntu. Building without any issues.
Would mind to tell me what is the version of the node you built with.
Node: 8.11.1
NPM: 6.1.0
Thank you, this version worked. I run success, but failed to run dist. My network is terrible
Cool tutorial. First time using electron. Really like all the things you can do with this application. One thing I am trying to figure out is hiding the cursor when the screen is being captured. I started by playing around with hover and focus on the buttons but windows change and there is a small timeout before screen capture so its tricky. So when screen shooting MS VSCode the cursor kinda falls through to that program. I have enough time to drag the cursor to my other monitor before the pic fires and of course this isnt a big deal at all…but was wondering if you had any ideas. Again awesome writeup Im learning a lot studying this code.
Hi Benjamin. Sorry for the late reply. Currently, Electron’s screen capturer API doesn’t support cursor hiding when capturing screen. However, you can hide cursor at the corners of the screen. You can use Robot.js to programmatically move your cursor before taking a screenshot instead of doing it manually.
Super, Thanks.
I was trying ot update to electron 8, but without success.
what I have to do?
I’ll try to update the electron package used in repository and test if it works.
hi! just wanna ask if you already updated to higher version of electron. I really like your project.