In this tutorial, we are building a Post Scheduler for Facebook pages. We’ll start off by creating an Express.js web server and use Passport.js to authenticate users with Facebook. After setting up authentication, we’ll build a react app to provide users with an interface to schedule text and images posts for Facebook pages.
Getting Started
Let’s start by initializing a package.json file by running npm init in your working directory and add these dependencies.
|
1 2 3 4 5 6 7 8 9 10 11 12 13 14 15 |
"dependencies": { "body-parser": "^1.13.2", "config": "^1.30.0", "connect-ensure-login": "^0.1.1", "cookie-parser": "^1.3.5", "ejs": "^2.3.3", "express": "^4.13.1", "express-fileupload": "^0.4.0", "express-session": "^1.11.3", "mongoose": "^5.1.4", "morgan": "^1.6.1", "passport": "^0.2.2", "passport-facebook": "^2.0.0", "path": "^0.12.7", } |
Run npm install. Now create a server.js in your working directory and add this code. We’re using EJS templating engine and mongoose ODM for the querying database.
|
1 2 3 4 5 6 7 8 9 10 11 12 13 14 15 16 17 18 19 20 21 22 23 24 25 26 27 28 29 30 31 32 33 34 35 36 37 38 39 40 41 42 43 44 45 |
const fs = require('fs'), https = require('https'), express = require('express'), Session = require('express-session'), FileStore = require('session-file-store')(Session), fileUpload = require('express-fileupload'), bodyParse = require('body-parser'), config = require('config'), middleware = require('connect-ensure-login'), scheduler = require('./cron/scheduler'), options = { key: fs.readFileSync(__dirname + '/certs/selfsigned.key'), cert: fs.readFileSync(__dirname + '/certs/selfsigned.crt'), }, port = 8888; const app = express(); mongoose.connect('mongodb://127.0.0.1/nodeScheduler'); app.set('views', __dirname + '/views'); app.set('view engine', 'ejs'); app.use('/src', express.static(__dirname + '/public')); app.use('/media', express.static(__dirname + '/media')); app.use(fileUpload()); app.use(require('morgan')('combined')); app.use(require('cookie-parser')()); app.use(bodyParse.urlencoded({extended: true})); app.use(bodyParse.json()); app.use(Session({ store: new FileStore(), secret: config.get('sessionSecret'), resave: true, saveUninitialized: true })); app.get('/', function (req, res) { res.render('app', {user: req.user}); }); https.createServer(options, app).listen(port, function(){ console.log("Express server listening on port " + port); }); |
We need to set up an HTTPS server for our app to use Facebook Graph API. We’re creating an Express.js app and passing it to https.createServer along with our self-signed certs. You can generate self-signed SSL certificate by running
|
1 |
sudo openssl req -x509 -nodes -days 365 -newkey rsa:2048 -keyout ./certs/selfsigned.key -out ./certs/selfsigned.crt |
Also, add your certs directory to the .gitignore file. We’re using session-file-store module to persist user sessions by storing them on the file system. We’re using config module to retrieve config. In index route, we’re rendering app.ejs view which will bootstrap CSS and Javascript and mount React app.
App Configuration
We’re using config module to store and retrieve data from a separate config file. Create default.json file inside config directory.
|
1 2 3 4 5 6 |
{ "appId" : "YOUR_APP_ID", "appSecret" : "YOUR_APP_SECRET", "sessionSecret" : "STRONG_SECRET", "callbackURL" : "https://127.0.0.1:8888/login/facebook/callback" } |
Add your Facebook app id and secret along with a strong secret to secure express sessions. Also, add this file to .gitignore.
User and Schedule Posts Schema
We’ll store users in MongoDB users collection after authentication. Let’s define User and Post schema and models. Create database/Schema.js file in your working directory and add this code.
|
1 2 3 4 |
let mongoose = require('mongoose'); exports.User = mongoose.model('User', require('./UserSchema')); exports.Post = mongoose.model('Post', require('./PostSchema')); |
Now create UserSchema.js and PostSchema.js file.
|
1 2 3 4 5 6 7 8 9 10 11 |
let mongoose = require('mongoose'); let Schema = mongoose.Schema; let UserSchema = new Schema({ name: String, email : String, facebookID : String, accessToken : String, }); module.exports = UserSchema; |
|
1 2 3 4 5 6 7 8 9 10 11 12 13 14 15 16 |
let mongoose = require('mongoose'); let Schema = mongoose.Schema; let PostSchema = new Schema({ user_id : String, message : String, media : String, schedule_time : String, page_id : String, page_name : String, published : Boolean, type_of : String, publish_id : String }); module.exports = PostSchema; |
Passport Facebook Authentication
We’re using Passport’s Facebook strategy to authenticate users and retrieve an access token. Let’s define a passport Facebook strategy. Create auth folder in your working directory and create passport.js file in it.
|
1 2 3 4 5 6 7 8 9 10 11 12 13 14 15 16 17 18 19 20 21 22 23 24 25 26 27 28 29 30 31 32 33 34 |
const config = require('config'); const passport = require('passport'); const Strategy = require('passport-facebook').Strategy; const User = require('../database/Schema').User; passport.use(new Strategy({ clientID: config.get('appId'), clientSecret: config.get('appSecret'), callbackURL: config.get('callbackURL'), profileFields: ['id', 'displayName', 'link', 'email'] }, function (accessToken, refreshToken, profile, cb) { let query = {facebookID: profile.id}, update = { name: profile.displayName, email: profile.emails[0].value, accessToken: accessToken }, options = {upsert: true, new: true, setDefaultsOnInsert: true}; User.findOneAndUpdate(query, update, options, function (error, result) { if (error) return; return cb(null, profile); }); })); passport.serializeUser(function (user, cb) { cb(null, user); }); passport.deserializeUser(function (obj, cb) { cb(null, obj); }); module.exports = passport; |
Now add it to your login route middlewares. Create routes/login.js file and add this code.
|
1 2 3 4 5 6 7 8 9 10 11 12 13 14 15 16 17 18 19 20 21 22 23 24 25 26 27 28 29 |
const express = require('express'), router = express.Router(), passport = require('passport'); router.get('/', require('connect-ensure-login').ensureLoggedOut(), (req, res) => { res.render('login', {user : null}); }); router.get('/facebook', require('connect-ensure-login').ensureLoggedOut(), passport.authenticate('facebook', { scope: [ 'email', 'user_posts', 'manage_pages', 'publish_pages' ] })); router.get('/facebook/callback', require('connect-ensure-login').ensureLoggedOut(), passport.authenticate('facebook', {failureRedirect: '/login'}), (req, res) => { res.redirect('/'); }); module.exports = router; |
We’re asking users for permissions to allow access to manage their Facebook pages. Users will be redirected back to our callback URL after authorization and their profile along with access token will be passed to passport strategy callback. Add these routes to your app in server.js.
|
1 2 3 4 5 6 |
const passport = require('./auth/passport'); app.use(passport.initialize()); app.use(passport.session()); app.use('/login', require('./routes/login')); |
In passport strategy callback, we’re querying the collection with mongoose findOneAndUpdate method. If a user already exists with facebookID, we’ll update it. Otherwise, we’ll create a new user. After create or update, user profile will be passed to passport’s callback to create a session.
|
1 2 3 4 5 6 7 8 9 10 11 12 13 |
(accessToken, refreshToken, profile, cb) => { let query = {facebookID: profile.id}, update = { name: profile.displayName, email: profile.emails[0].value, accessToken: accessToken }, options = {upsert: true, new: true, setDefaultsOnInsert: true}; User.findOneAndUpdate(query, update, options, function (error, result) { if (error) return; return cb(null, profile); }); } |
Post Scheduler
Now that we’ve set up authentication, we can start building our post scheduler. Add app.ejs view to views folder and add this code to it.
|
1 2 3 4 5 6 7 8 9 10 11 12 13 14 15 16 17 18 19 20 21 |
<!doctype html> <html lang="en"> <% include header.ejs %> <body> <% include navbar.ejs %> <div class="container app"> <% if (!user) { %> <h3>Welcome!</h3> <div class="leader"> Please <a href="/login">login</a> to use posts scheduler </div> <% } else { %> <div id="root"></div> <% } %> </div> <% include footer.ejs %> </body> </html> |
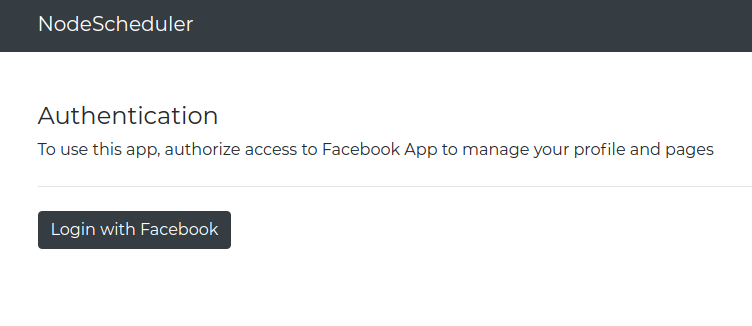
If a user is authenticated, we’ll render #root div on which we’ll mount our React app. Otherwise, we’ll render a link to the login page. Add login.ejs view to views folder.
|
1 2 3 4 5 6 7 8 9 10 11 12 13 14 15 16 17 18 |
<!doctype html> <html lang="en"> <% include header.ejs %> <body> <% include navbar.ejs %> <div class="container app"> <h4>Authentication</h4> <div class="leader"> To use this app, authorize access to Facebook App to manage your profile and pages </div> <hr class="my-4"> <a class="btn btn-light btn-dark" href="/login/facebook" role="button">Login with Facebook</a> </div> <% include footer.ejs %> </body> </html> |
Here’s what it looks like.
After authentication, user will be redirected back the callback URL and a session will be created. We’ll render our React app if user is authenticated. Let’s create our App component. We’ll place our frontend code in src folder. Create src/app.js file and add this code.
|
1 2 3 4 5 6 7 8 9 10 11 12 13 14 15 16 17 18 19 20 21 22 |
import React from 'react'; import Scheduler from "./Scheduler"; import Posts from "./Posts"; class App extends React.Component{ render(){ return( <div id="app"> <Scheduler/> <hr className="my-4"/> <Posts/> </div> ) } } if(document.getElementById('root') !== null){ ReactDOM.render( <App/>, document.getElementById('root') ); } |
App component is rendering a Scheduler and Posts component. In Scheduler component, we’ll render a form to input details for scheduling and Posts component to render scheduled posts.
|
1 2 3 4 5 6 7 8 9 10 11 12 13 14 15 16 17 18 19 20 21 22 23 24 25 26 27 28 29 30 31 32 33 34 35 36 37 38 39 40 41 42 43 44 45 46 47 48 49 50 51 52 53 54 55 56 57 58 59 60 61 62 63 64 65 66 67 68 69 70 71 72 73 74 75 76 77 78 79 80 81 82 83 84 85 86 87 88 89 90 91 92 93 94 95 96 97 98 |
import React from 'react'; import toastr from 'toastr'; import {post, get} from 'axios'; import DateTimePicker from 'react-datetime-picker'; class Scheduler extends React.Component { constructor(props) { super(props); this.state = { date: new Date(), file: null, message: '', pages : [], page : {id : '', name : ''} } } render() { return ( <div className="scheduler"> <form onSubmit={this.schedulePost.bind(this)}> <div className="form-group"> <label> <h5>Message</h5> </label> <textarea value={this.state.message} onChange={this.onChange.bind(this)} className="form-control" rows="3" /> </div> <div className="row"> <div className="col-lg-4 col-md-4"> <div className="form-group"> <label> <h5>Image</h5> </label> <input type="file" name="file" className="form-control-file" ref={ref => (this.fileInput = ref)} onChange={this.onFileChange.bind(this)} /> </div> </div> <div className="col-lg-4 col-md-4"> <div className="form-group w-100"> <label htmlFor="exampleFormControlSelect1">Available Pages</label> <select className="form-control" value={this.state.page.id} onChange={this.onPageSelect.bind(this)}> <option>Select Page</option> {this.state.pages.map(page => { return ( <option value={page.id} key={page.id}> {page.name} </option> ); })} </select> </div> </div> <div className="col-lg-4 col-md-4"> <div className="form-group"> <label> <h5> Scheduler Date and Time </h5> </label> <div> <DateTimePicker onChange={this.onDateChange.bind(this)} value={this.state.date} /> </div> </div> </div> </div> <div className="form-group text-center"> <button type="submit" className="btn btn-dark align-content-center"> Schedule Post </button> </div> </form> </div> ) } } export default Scheduler; |
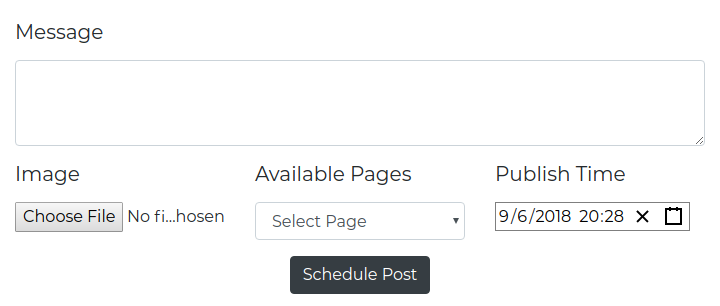
In Scheduler component, we’re rendering a textarea for text input, a file input to upload an image, a drop-down with a list of pages and a DateTime picker to select date and time. This is how it looks like.
Add state and callbacks to handle onChange events in our Scheduler component.
|
1 2 3 4 5 6 7 8 9 10 |
constructor(props) { super(props); this.state = { date: new Date(), file: null, message: '', pages : [], page : {id : '', name : ''} } } |
|
1 2 3 4 5 6 7 8 9 10 11 12 13 14 15 16 17 18 19 20 21 22 23 24 25 26 27 28 29 30 |
onDateChange(date) { this.setState({date}) } onChange(e) { this.setState({message: e.target.value}); } onFileChange(e) { if (this.validateFile(e.target.files[0])) { this.setState({file: e.target.files[0]}) } } onPageSelect(e){ this.setState({ page : this.state.pages.filter(page => { return page.id === e.target.value })[0] }) } validateFile(file) { let allowed_types = ['image/jpeg', 'image/png']; if (!allowed_types.includes(file.type)) { toastr.error(file.type + ' mime type not supported. We only accept JPEG and PNG images', 'Invalid file type') return false; } return true; } |
On file input change, we’ll validate it by mime type. To validate date add these methods.
|
1 2 3 4 5 6 7 8 9 |
validateDate(date) { let selected = (new Date(date).getTime() / 1000) - 10, current = new Date().getTime() / 1000; return selected > current; } getDateInSeconds(date){ return Math.floor(new Date(date).getTime() / 1000); } |
To retrieve user pages, we’ll requests /pages route.
|
1 2 3 4 5 6 7 |
componentDidMount(){ get('/pages').then((response) => { this.setState({ pages : response.data }); }); } |
To handle this request, add this route your routes/scheduler.js file.
|
1 2 3 4 5 6 7 8 9 10 11 12 13 14 15 16 17 |
router.get('/pages', middleware.ensureLoggedIn(), (req, res) => { User.findOne({facebookID: req.user.id}, (err, user) => { if (err) return; FB.setAccessToken(user.accessToken); FB.api('/me/accounts', (pages) => { let data = pages.data.map((page) => { return { name : page.name, id : page.id } }); res.json([...data]); }); }); }); |
We’re using fb node module to communicate with Facebook Graph API. Currently, Facebook Javascript SDK doesn’t support Node.js. After retrieving pages, we will return an array of page id and names as response and update pages state in Scheduler component.
To handle form submit, add this method.
|
1 2 3 4 5 6 7 8 9 10 11 12 13 14 15 16 17 18 19 20 21 22 23 24 25 26 27 28 29 30 31 32 33 34 35 36 37 38 39 40 41 42 43 44 45 46 47 48 49 50 51 52 53 54 55 |
schedulePost(e) { console.log(this.state); e.preventDefault(); let error = false; if (!this.state.file && !this.state.message.length) { error = true; toastr.error( 'To schedule post, please provide a message or image', 'Please provide a message or image' ); } if (!this.validateDate(this.state.date)) { error = true; toastr.error( 'Scheduled date has already been passed, please select a valid date', 'Invalid Date' ); } if(!Object.keys(this.state.page).length){ error = true; toastr.error( 'Please select a page or profile from dropdown menu', 'Page or Profile required' ); } if (!error) { const formData = new FormData(); formData.append('file', this.state.file); formData.append('message', this.state.message); formData.append('date', this.getDateInSeconds(this.state.date)); formData.append('page_id', this.state.page.id); formData.append('page_name', this.state.page.name); const config = { headers: { 'content-type': 'multipart/form-data' } }; console.log(formData); post('/schedule', formData, config).then((response) => { if(!response.data.error){ this.setState({ date: new Date(), file: null, message: '', }); this.fileInput.value = ''; toastr.success('Post Scheduled'); this.props.addPost(response.data.post); } }) } } |
On form submit, we’ll validate inputs. User can schedule a post with message or photo. One of these is required otherwise we’ll show an error. After validating all fields, we’ll pass data to /schedule route with axios post method. Add a /schedule endpoint route handler to routes/scheduler.js file.
|
1 2 3 4 5 6 7 8 9 10 11 12 13 14 15 16 17 18 19 20 21 22 23 24 25 26 27 28 29 30 31 32 33 34 35 36 37 38 39 40 41 42 43 44 45 46 47 48 49 50 51 52 53 54 55 56 57 58 59 60 61 |
const express = require('express') const router = express.Router(), randomString = require('random-string'), User = require('../database/Schema').User, Post = require('../database/Schema').Post, FB = require('fb'), fs = require('fs'), path = require('path'), middleware = require('connect-ensure-login'); router.post('/schedule', middleware.ensureLoggedIn(), (req, res) => { let file = req.files ? req.files.file : null, message = req.body.message, date = req.body.date, type = !file ? 'text' : 'photo', page_id = req.body.page_id, page_name = req.body.page_name, options = {new:true, safe: true, upsert: true}, uri = !file ? '' : '/media/'+ randomString({length: 20}) + '.' + file.name.split('.').pop(), post = { user_id : req.user.id, message : message, media : uri, schedule_time : date, published : false, page_id : page_id, page_name : page_name, type_of : type, }, query = {facebookID : req.user.id}; if(file){ let storage_path = path.join(__dirname, '../', uri); file.mv(storage_path, (err) => { if (err){ res.json(err); }else{ createPost(query, options, post, res); } }); }else{ createPost(query, options, post, res); } }); const createPost = (query, options, post, res) => { let new_post = new Post(post); new_post.save(function (err, doc) { if (err) res.json({error : err}); res.json({ error : false, post : doc }); }); }; module.exports = router; |
We’re using express-fileupload middleware to handle file uploads. If a file is present, we’ll move it to media directory. We’ll generate a random string and concatenate to file extension to create a unique name for the uploaded file. After moving uploaded file, we’ll create a new document in posts collection and return scheduled post as response. we’ll then call addToScheduledPosts props method and pass it post to add scheduled posts. This is how our scheduler form looks like.
Scheduled Posts
Update App component constructor and add state.
|
1 2 3 4 5 6 |
constructor(props){ super(props); this.state = { posts : [], } } |
We’ll pass posts state down to our Posts component along with delete and publish methods as a callback for onClick events.
|
1 2 3 4 5 6 7 8 9 10 11 12 13 14 15 16 17 18 19 20 21 22 23 24 25 26 27 28 29 30 31 32 33 34 35 36 37 38 39 40 41 42 43 44 45 46 47 48 |
componentDidMount(){ this.getPosts(false); } getPosts(status){ get('/posts', { params: { published : status } }).then((response) => { this.setState({posts : response.data}) }); } deletePost(id, e){ console.log(id); e.preventDefault(); axios.delete('/schedule', {params: {'id': id}}) .then((response) => { if(response.data.done){ this.setState({ posts : this.state.posts.filter((post) => { return post._id !== id }) }); toastr.success('Posts removed'); } }); } publish(id, e){ e.preventDefault(); console.log(id); post('/schedule/publish', { id : id }).then((response) => { console.log(response); if(response.data.published){ this.setState({ posts : this.state.posts.filter((post) => { return post._id !== id }) }); toastr.success('Posts published'); } }); } |
On the component mount, we’ll retrieve user’s scheduled post and pass them to Posts component. Add these route handlers to routes/scheduler.js.
|
1 2 3 4 5 6 7 8 9 10 11 |
router.get('/posts', middleware.ensureLoggedIn(), (req, res) => { console.log(); Post.find({ user_id : req.user.id, published : req.query.published },null, {sort: {schedule_time: 1}}, (err, posts) => { res.json(posts); }); }); |
On request to /posts route, we’ll return all scheduled posts with where user_id matches with requests user.id and published is set to false.
|
1 2 3 4 5 6 7 8 9 10 11 12 13 14 |
router.delete('/schedule', middleware.ensureLoggedIn(), (req, res) => { Post.findByIdAndRemove(req.query.id, (err, post) => { if(post.type_of === 'photo'){ fs.unlink(__dirname + post.media, (err) => { if(err) return console.log(err); res.json({done : true}) }); }else{ res.json({done : true}) } }); }); |
On requests to /posts delete request, we’ll use mongoose findByIdAndRemove method and remove the photo from media directory if its type is photo.
|
1 2 3 4 5 6 7 8 9 10 11 12 13 14 15 16 17 18 19 20 21 22 23 24 25 26 27 28 29 30 31 32 33 34 35 36 37 38 39 40 41 42 43 44 45 46 47 48 49 50 51 52 53 54 55 56 |
router.post('/schedule/publish', middleware.ensureLoggedIn(), (req, res) => { Post.findById(req.body.id, (err, post) => { let options = {}; if(post.type_of === 'photo'){ options = Object.assign(options, { source: fs.createReadStream(path.join(__dirname, '../', post.media)), caption: post.message, api_endpoint : post.page_id+'/photos' }, options); }else{ options = Object.assign(options, { message : post.message, api_endpoint : post.page_id+'/feed' }, options); } User.findOne({facebookID: req.user.id}, (err, user) => { if (err) return; FB.setAccessToken(user.accessToken); FB.api('/me/accounts', (pages) => { let page = pages.data.filter((page) => { return page.id === post.page_id })[0]; options = Object.assign(options, { access_token : page.access_token, }, options); publishPost(options, post, res); }); }); }); }); const publishPost = (options, post, response) => { FB.api(options.api_endpoint, 'post', options , (res) => { if(!res || res.error) { console.log(!res ? 'error occurred' : res.error); return; } let update = {published : true, publish_id : res.id}, options = {new: true}; Post.findByIdAndUpdate(post._id, update, options, function (error, result) { if (error) return; response.json({ published : true }) }); }); }; |
On requests to /schedule/publish route, we’ll use post.user_id to retrieve page access token. we’ll dynamically generate requests params. If it’s photo post, we’ll use fs.createReadStream method to open a read stream and use it to publish photo post to /page-id/photos Graph API endpoint. On successful publish, we’ll update post document with posts_id and mark it as published.
Update App component’s render method and pass these methods as props.
|
1 2 3 4 5 6 7 8 9 10 11 12 13 |
render(){ return( <div id="app"> <Scheduler addPost={this.addToScheduledPosts.bind(this)}/> <hr className="my-4"/> <Posts posts={this.state.posts} deletePost={this.deletePost.bind(this)} publish={this.publish.bind(this)} /> </div> ) } |
Create Posts component and add this code to display schedule post.
|
1 2 3 4 5 6 7 8 9 10 11 12 13 14 15 16 17 18 19 20 21 22 23 24 25 26 27 28 29 30 31 32 33 34 35 36 37 38 39 40 41 42 43 44 45 46 47 48 49 50 51 52 53 54 55 56 57 58 59 60 61 62 63 64 65 66 67 |
class Posts extends React.Component{ constructor(props){ super(props); this.state = { posts : props.posts } } static getDerivedStateFromProps(props, state){ return { posts : props.posts } } render(){ return ( <div className="scheduled-posts"> <h2 className="text-center"> Scheduled Posts </h2> <hr className="my-4"/> {this.state.posts.map((post) => { return ( <div className="post mr-auto ml-auto col-xs-12 col-sm-12 col-md-8 col-lg-6" key={post._id}> <div className="card"> {post.type_of === 'photo' && <img className="card-img-top" src={post.media}/>} <div className="card-body"> <h5 className="card-title">{post.message}</h5> <h6 className="card-subtitle mb-2 text-muted"> Page Name : {post.page_name} </h6> <h6 className="card-subtitle mb-2 text-muted"> Publish at : {moment.unix(post.schedule_time).format('MMMM Do YYYY, h:mm:ss a')} </h6> <h6 className="card-subtitle mb-2 text-muted"> Post Type : {post.type_of === 'text' ? 'Text' : 'Media'} </h6> <div className="actions"> <a href="#" className="card-link" onClick={this.props.deletePost.bind(this,post._id)}> Delete </a> <a href="#" className="card-link" onClick={this.props.publish.bind(this,post._id)}> Publish </a> </div> </div> </div> </div> ) })} </div> ) } } |
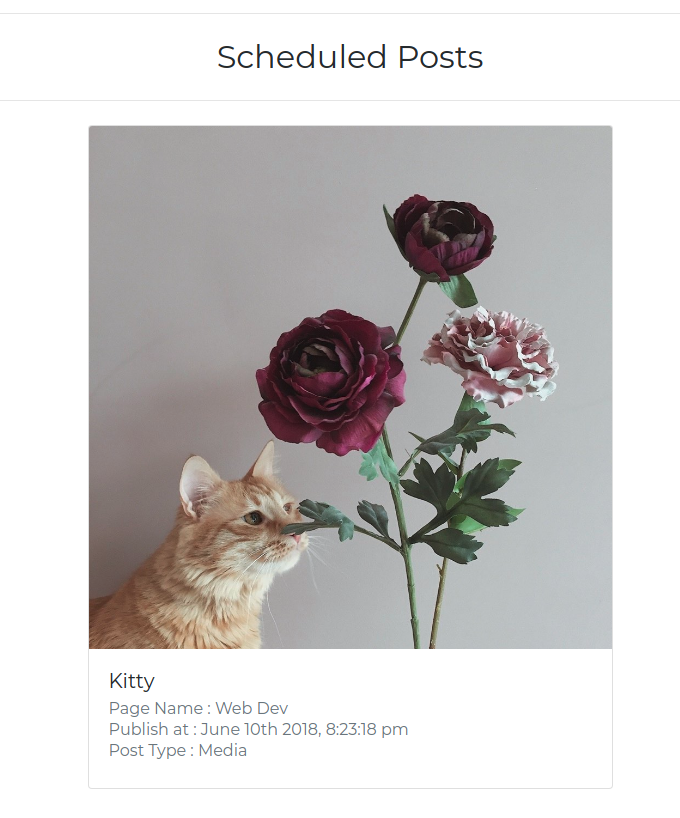
We’re binding deletePost and publish prop methods to Delete and Publish button onClick handlers. When clicked, they’ll call delete and publish method on App component with an id of the post. We’ve already defined route handlers to handle those requests. We’ll remove published or deleted posted from scheduled posts after a success response from the server. This is how our scheduler form and posts look like.
Cron Scheduler
So far we’ve been manually publishing scheduled posts by clicking on publish button. Now we’ll use cron task scheduler to publish pending posts. Add cron/scheduler.js file to your project.
|
1 2 3 4 5 6 7 8 9 10 11 12 13 14 15 16 17 18 19 20 21 |
const CronJob = require('cron').CronJob, Post = require('../database/Schema').Post, User = require('../database/Schema').User, FB = require('fb'), fs = require('fs'), path = require('path'); module.exports = () => { new CronJob('* * * * * *', function() { let now = Math.floor(new Date().getTime() / 1000); let post_query = Post.find({published: false, schedule_time : now}); post_query.then(posts => { publishPosts(posts); }).catch(err => { console.log(err); }); }, null, true, 'Asia/Karachi'); }; |
CronJob will execute callback every second to check if there’s a post pending for publishing in our posts collection. Since we’re storing schedule_time in seconds on post collection, we can query our collection by comparing current time to schedule_time.
|
1 2 3 4 5 6 7 8 9 10 11 12 13 14 15 16 17 18 19 20 21 22 23 24 25 26 27 28 29 30 31 32 33 34 35 |
const publishPosts = (posts) => { posts.map(post => { let user_query = User.findOne({facebookID: post.user_id}); user_query.then(user => { let options = {}; if(post.type_of === 'photo'){ options = Object.assign(options, { source: fs.createReadStream(path.join(__dirname, '../', post.media)), caption: post.message, api_endpoint : post.page_id+'/photos' }, options); }else{ options = Object.assign(options, { message : post.message, api_endpoint : post.page_id+'/feed' }, options); } FB.setAccessToken(user.accessToken); FB.api('/me/accounts', (pages) => { let page = pages.data.filter((page) => { return page.id === post.page_id })[0]; options = Object.assign(options, { access_token : page.access_token, }, options); publishPost(options, post); }); }) }); }; |
For every selected post, we’ll retrieve page token with its user_id and then publish to the page by calling publishPost.
|
1 2 3 4 5 6 7 8 9 10 11 12 13 14 15 |
const publishPost = (options, post) => { FB.api(options.api_endpoint, 'post', options , (res) => { if(!res || res.error) { console.log(!res ? 'error occurred' : res.error); return; } let update = {published : true, publish_id : res.id}, options = {new: true}; Post.findByIdAndUpdate(post._id, update, options, (error, result) => { if (error) return; console.log(result); }); }); }; |
I’ve set up a GitHub repository for you guys. Build instructions are available in the readme file. If you’ve any issue, please comment and I’ll try to help you.
Wow Nice Article. Good Job… 🙂
Please do some blogs and tutorials about Laravel.
I have a question. Can I add the option to publish a photo in my personal account profile registered on facebook?. How could I achieve or add that option?. Thnk!
To publish to a user profile, we need publish_actions permission which was deprecated. Apps created after 24 April 2018 won’t be able to publish to user profiles. The only way you can share to user profiles is using Facebook’s Share dialogs.
Good job. Please, I am interested in developing an app that displays the number of likes of our facebook page. Any hint?
Thanks for the article and code example!
I am trying to get your example working on a localhost setup. I have MongoDB, and the SSL working, and this is what my config looks like:
{
“appId”: “xxxxxxxxxxxxxxxxxxx”,
“appSecret”: “xxxxxxxxxxxxxxxx”,
“sessionSecret”: “EXPRESS_SESSION_SECRET”,
“callbackURL”: “https://localhost:8888/auth/facebook/callback”,
“scheduler_timezone”: “Asia/Karachi”
}
On my facebook developer console, under “App Domains” I have “localhost”. Then at the bottom of the page under website, I have my site URL as https://localhost:8888
Finally, under “Client O Auth Settings” I have my Valid OAuth Redirect URIs set to https://localhost:8888/auth/facebook/callback
With all that being said I still get this error:
“Can’t Load URL: The domain of this URL isn’t included in the app’s domains. To be able to load this URL, add all domains and subdomains of your app to the App Domains field in your app settings.”
Any ideas as to how to fix this? In your example it looked like you ran it on a live server, have you been able to get this running on a localhost? I’d appreciate any help you are willing to give.
Thanks!
Can I use mongoose Schema without a database? I am building a microservice for facebook authentication. How can I pass accessToken in done.
can i use this for facebook groups?