Today we are building an image gallery with Laravel and React. We are going to use react-dropzone to build an image uploader. react-dropzone is a React’s implementation of popular drag and drop library for file uploading. On the backend, we are going to use Laravel’s Storage API to store images.
Getting Started
Let’s start by creating a new Laravel project and change default scaffolding to React. Run these commands.
|
1 2 3 4 5 |
composer create-project laravel/laravel laravel-gallery --prefer-dist cd laravel-gallery php artisan preset react # change preset to react npm install && npm run watch # install dependencies php artisan make:auth # generate authentication scaffolding |
Database and Migrations
Populate .env file with your database credentials and run this command to create model and migration for photos table.
php artisan make:model Photos --migration
Add this code to your migration.
|
1 2 3 4 5 6 7 8 9 10 |
Schema::create('photos', function (Blueprint $table) { $table->increments('id'); $table->integer('user_id')->unsigned(); $table->string('uri'); $table->boolean('public'); $table->integer('height'); $table->integer('width'); $table->foreign('user_id')->references('id')->on('users')->onDelete('cascade'); $table->timestamps(); }); |
We are storing user_id of uploader along with image URI, height, and width of uploaded images on photos table. Later on, when building frontend gallery, we’ll pass height and width of images to react-photo-gallery which automatically calculates aspect ratio to generate a responsive image layout. After storing uploaded file, we’ll store its local path in URI column.
Also, update your Photos model and add these columns to $fillable array to avoid mass assignment exception.
|
1 2 3 4 5 6 |
class Photos extends Model { protected $table = 'photos'; protected $fillable = ['uri', 'public', 'height', 'width']; } |
Installing Dependencies
Before moving on to the Frontend part, install these dependencies.
|
1 2 3 4 5 6 7 8 9 10 11 12 13 14 |
"dependencies": { "axios": "^0.18", "bootstrap": "^4.0.0", "jquery": "^3.2", "lodash": "^4.17.4", "popper.js": "^1.12", "react": "^16.2.0", "react-dom": "^16.2.0", "react-dropzone": "^4.2.11", "react-images": "^0.5.17", "react-photo-gallery": "^6.0.28", "react-router-dom": "^4.3.1", "toastr": "^2.1.4" } |
We are using react-router v4 with React for routing.
Bootstrapping React App
Add app.blade.php file to views folder and add this HTML scaffolding to it.
|
1 2 3 4 5 6 7 8 9 10 11 12 13 14 15 16 17 18 |
<!doctype html> <html lang="en"> <head> <meta charset="UTF-8"> <meta name="viewport" content="width=device-width, user-scalable=no, initial-scale=1.0, maximum-scale=1.0, minimum-scale=1.0"> <meta http-equiv="X-UA-Compatible" content="ie=edge"> <title>Laravel React Gallery</title> <meta name="csrf-token" content="{{ csrf_token() }}"> <link rel="stylesheet" href="{{mix('/css/app.css')}}"> </head> <body> <div id="root"></div> <script src="{{mix('/js/app.js')}}"></script> </body> </html> |
Now add an all requests route to render this view against all incoming requests.
|
1 2 3 4 5 |
Auth::routes(); Route::group(['middleware' => ['auth']], function(){ Route::get('{all?}', 'GalleryController@index')->where('all', '([A-z\d-\/_.]+)?'); }); |
We’ve added all requests route under an auth route group to ensure authenticated access to our single page application. Create GalleryController and add index method to it.
php artisan make:controller GalleryController
|
1 2 3 4 5 6 |
class GalleryController extends Controller { public function index(){ return view('app'); } } |
React App
Now that we’ve configured our application routes to serve our SPA, we can start writing our React app. Let’s start by wrapping our application’s Root component inside a BrowserRouter. resources/assets/js/app.js is our applications entry point.
|
1 2 3 4 5 6 7 8 9 10 11 12 13 |
import React from 'react'; import './bootstrap'; import Root from './components/Root'; import ReactDOM from 'react-dom'; import {BrowserRouter} from 'react-router-dom'; if (document.getElementById('root')) { ReactDOM.render( <BrowserRouter> <Root/> </BrowserRouter>, document.getElementById('root')); } |
Now create a Root.js file under resources/assets/js/components directory and add this code.
|
1 2 3 4 5 6 7 8 9 10 11 12 13 14 15 16 17 18 19 20 21 22 23 24 25 |
import {Route} from 'react-router-dom'; import React, {Component, Fragment} from 'react'; import Navbar from "./Navbar"; import Gallery from "./Gallery"; import Uploader from "./Uploader"; import ManageGallery from "./ManageGallery"; export default class Root extends Component { render() { return ( <Fragment> <Route path="/" render={(props) => ( <Navbar {...props}/> )}/> <div className="container"> <Route exact path="/" component={Gallery}/> <Route exact path="/manage" component={ManageGallery}/> <Route exact path="/upload" component={Uploader}/> </div> </Fragment> ); } } |
We are rendering four subcomponents under our Root component, Navbar, Gallery, ManageGallery, and Uploader.
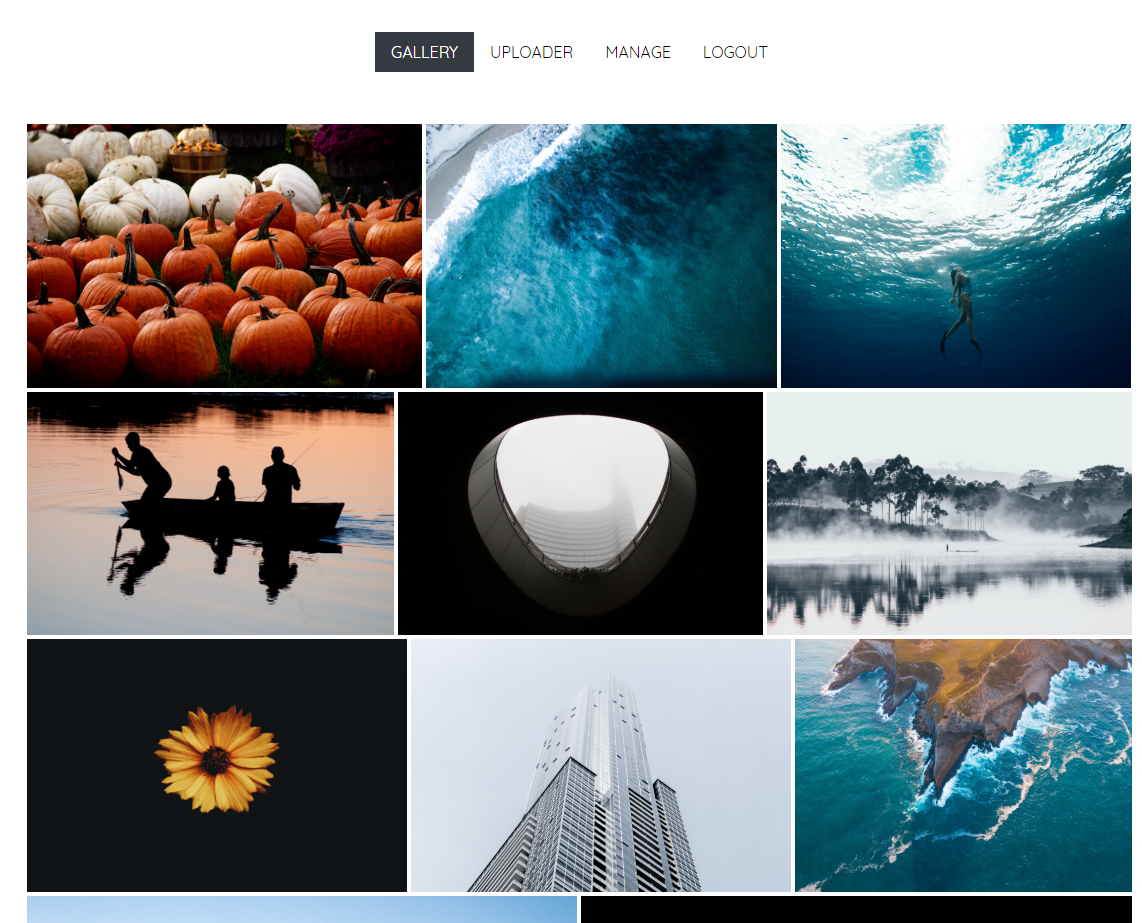
Navigation
To allow users to navigate between components, we are rendering our Navbar component at the top. Navbar component is visible on all routes.
|
1 2 3 4 5 6 7 8 9 10 11 12 13 14 15 16 17 18 19 20 21 22 23 24 25 26 27 28 29 30 31 32 33 34 35 36 37 38 39 40 41 42 43 44 |
export default class Navbar extends Component { constructor(props){ super(props); console.log(props); } render() { return ( <div className="container nav-bar"> <ul className="nav justify-content-center"> <li className="nav-item"> <Link to={'/'} className={`nav-link ${this.props.location.pathname === '/' ? 'active' : ''}`} > GALLERY </Link> </li> <li className="nav-item"> <Link to={'/upload'} className={`nav-link ${this.props.location.pathname === '/upload' ? 'active' : ''}`} > UPLOADER </Link> </li> <li className="nav-item"> <Link to={'/manage'} className={`nav-link ${this.props.location.pathname === '/manage' ? 'active' : ''}`} > MANAGE </Link> </li> <li className="nav-item"> <a className="nav-link" href="/logout">LOGOUT</a> </li> </ul> </div> ); } } |
We are using render prop instead of component on Route to allow it to pass down its props to Navbar component. We are using location pathname from props to assign an active class to our navigation links. This is how it looks like.

Image Uploader
Now create Uploader.js file under components directory and add this code.
|
1 2 3 4 5 6 7 8 9 10 11 12 13 14 15 16 17 18 19 20 21 22 23 24 25 26 27 28 29 30 31 32 33 34 35 36 37 38 39 40 41 42 43 44 45 46 47 48 49 50 51 52 53 54 55 56 57 58 59 60 61 62 63 64 65 66 67 68 69 70 71 72 73 74 75 76 77 78 79 80 81 82 83 84 |
import React, {Component, Fragment} from 'react'; import Dropzone from 'react-dropzone'; import toastr from 'toastr'; import {post} from 'axios'; export default class Uploader extends Component { constructor(props){ super(props); this.state = { images : [], progress : 0, uploading : true, supported_mime : [ 'image/jpeg', 'image/png', ] } } render() { return ( <div className="uploader"> <div className="text-center"> <Dropzone onDropAccepted={this.onDrop.bind(this)} onDropRejected={this.onDropRejected.bind(this)} className="btn btn-dark" accept={this.state.supported_mime} > Select Images </Dropzone> {this.state.images.length > 0 && <button className="btn btn-dark uploadBtn" onClick={this.uploadFiles.bind(this)} > Upload </button> } </div> {this.state.images.length ? <Fragment> {this.state.uploading && <div className="progress"> <div className="progress-bar" role="progressbar" style={{width : this.state.progress}} aria-valuenow={this.state.progress} aria-valuemin="0" aria-valuemax="100"/> </div> } <div className="images"> { this.state.images.map((file) => <div key={file.preview} className="image"> <span className="close" onClick={this.removeDroppedFile.bind(this, file.preview)} >X</span> <img src={file.preview} alt=""/> </div> ) } </div> </Fragment> : <div className="no-images"> <h5 className="text-center"> Selected images will appear here </h5> </div> } </div> ); } } |
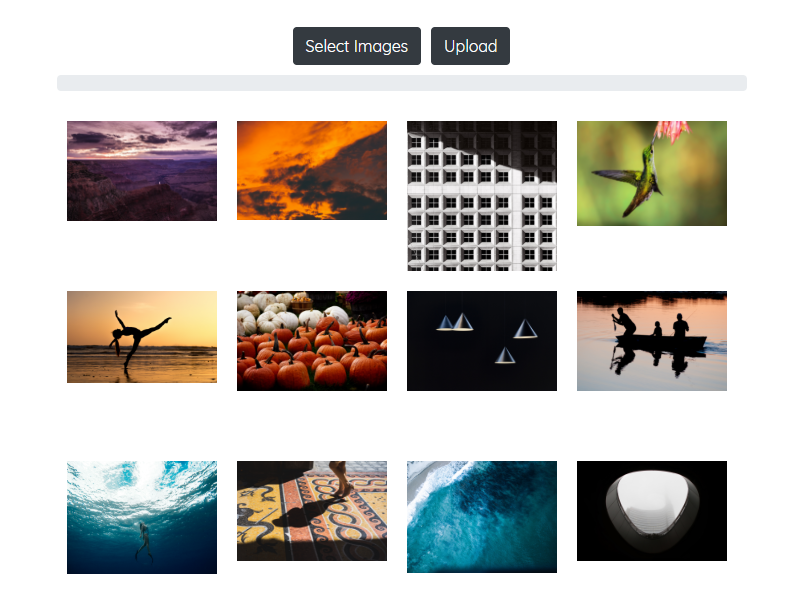
In our Uploader component, we’re rendering a dropzone button, an upload button, bootstrap progress, a div to display accepted images and a message in case no images are selected. We’ve added two function callback as props to dropzone which will be called after selected images are accepted or rejected. Lets define these methods to handle these callbacks.
|
1 2 3 4 5 6 7 8 9 10 11 |
onDrop(images){ this.setState({ images : this.state.images.concat([...images]) }); } onDropRejected(images){ if(images.length){ toastr.error('Please upload valid image files. Supported extension JPEG and PNG', 'Invalid MIME type') } } |
dropzone automatically validates files by mime type. We’re passing an array of acceptable mime type strings as accept prop to Dropzone component. On successful selection, we’ll add selected files to images state. On rejection, we’ll show a toastr error with invalid file upload error. We’ll show upload button if images exist on images state.
Now let’s implement upload button onClick handler.
|
1 2 3 4 5 6 7 8 9 10 11 12 13 14 15 16 17 18 19 20 21 22 23 |
uploadFiles(){ let images = this.state.images, config = { headers: { 'Content-Type': 'multipart/form-data' } }, total_files = this.state.images.length, uploaded = 0; this.setState({ uploading : true }); images.map((image) => { let formData = new FormData(); formData.append("file", image); post("/photos", formData, config).then(response => { const done = response.data; if(done){ this.removeDroppedFile(image.preview); this.calculateProgress(total_files, ++uploaded); } }); }); } |
We are separately uploading every accepted file. After successfully upload, we’ll remove the file from state and update the progress bar. Add these routes to your app to handle file requests.
|
1 2 3 4 5 6 7 8 9 10 11 12 |
Route::group(['middleware' => ['auth']], function(){ Route::get('/photos', 'GalleryController@getPhotos'); Route::post('/photos', 'GalleryController@uploadPhotos'); Route::delete('/photos', 'GalleryController@deletePhoto'); Route::get('/logout', 'Auth\LoginController@logout'); Route::get('{all?}', 'GalleryController@index')->where('all', '([A-z\d-\/_.]+)?'); }); |
Add uploadPhotos method to your GalleryController to upload files.
|
1 2 3 4 5 6 7 8 9 10 11 12 13 14 15 16 17 18 19 20 21 22 23 24 |
public function uploadPhotos(Request $request) { $file = $request->file('file'); $ext = $file->extension(); $name = str_random(20).'.'.$ext ; list($width, $height) = getimagesize($file); $path = Storage::disk('public')->putFileAs( 'uploads', $file, $name ); if($path){ $create = Auth::user()->photos()->create([ 'uri' => $path, 'public' => false, 'height' => $height, 'width' => $width ]); if($create){ return response()->json([ 'uploaded' => true ]); } } } |
In this method, we are retrieving the uploaded file and its extension and generate a unique name by concatenating file extension with a random string. We are then calculating image height and width with getimagesize() method. After storing file to public disk using Laravel’s Storage facade, we’re creating a new post on posts table with URI of uploaded image. After a successful upload, we’ll remove the file from Uploader component state. Our file uploader looks like this.
To remove any selected images from the uploader, we also need to define a removeDroppedFile method.
|
1 2 3 4 5 6 7 |
removeDroppedFile(preview, e = null){ this.setState({ images : this.state.images.filter((image) => { return image.preview !== preview }) }) } |
We’re rendering a remove button along without our images. When pressed, we’ll simply remove the selected image from the Uploader component state.
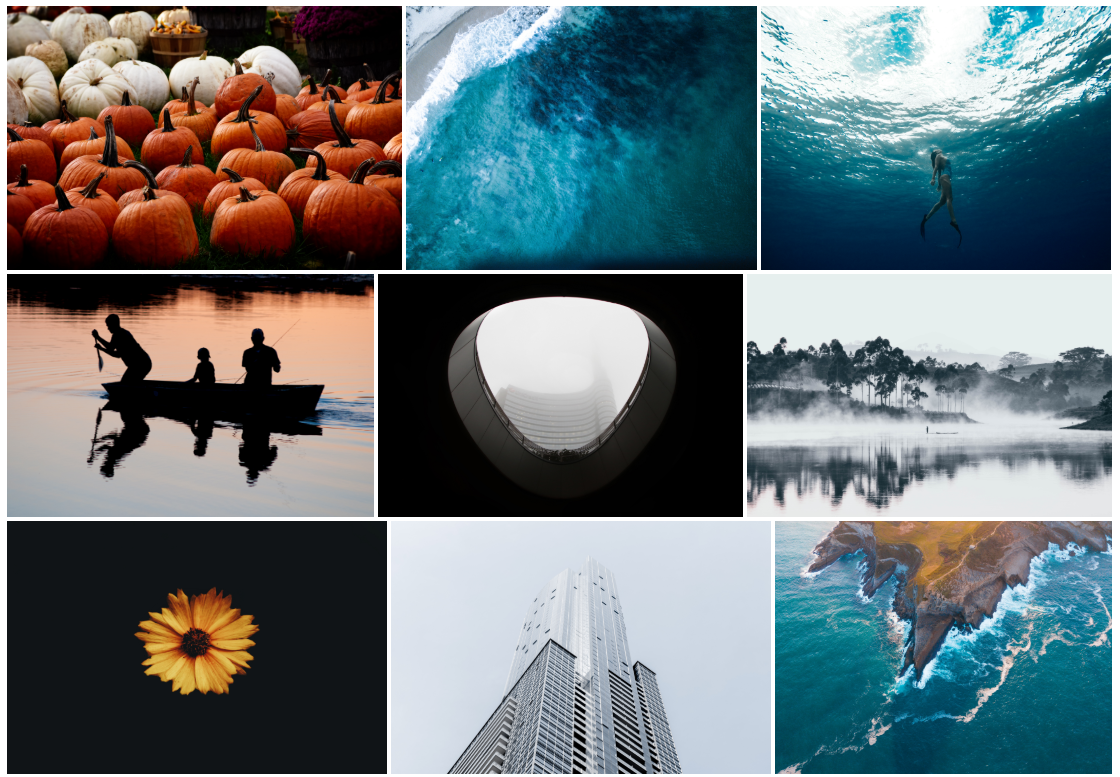
Image Gallery
We’ll display uploaded images in our Gallery component. Add Gallery.js file to components directory.
|
1 2 3 4 5 6 7 8 9 10 11 12 13 14 15 16 17 18 19 20 21 22 23 24 25 26 27 28 29 30 31 32 33 34 35 36 37 38 39 40 41 42 43 44 45 46 47 48 49 50 51 52 53 54 55 56 57 58 59 60 61 62 63 64 65 66 67 68 69 70 71 72 73 74 75 76 77 78 |
export default class Gallery extends Component { constructor(props){ super(props); this.state = { images : [], currentImage: 0, lightboxIsOpen: false }; } componentDidMount(){ get('/photos') .then(response => { const images = response.data; this.setState({ images : images }) }) } openLightbox(event, obj) { this.setState({ currentImage: obj.index, lightboxIsOpen: true, }); } closeLightbox() { this.setState({ currentImage: 0, lightboxIsOpen: false, }); } gotoPrevious() { this.setState({ currentImage: this.state.currentImage - 1, }); } gotoNext() { this.setState({ currentImage: this.state.currentImage + 1, }); } render() { let photos = this.state.images.map(image => { return { src : '/storage/' + image.uri, width : image.width, height : image.height, id : image.id } }); return ( <div className="gallery"> {this.state.images.length ? <ReactGallery photos={photos} onClick={this.openLightbox.bind(this)} /> : <div className="no-images"> <h5 className="text-center"> You currently have no images in your photos gallery </h5> </div> } <Lightbox images={photos} onClose={this.closeLightbox.bind(this)} onClickPrev={this.gotoPrevious.bind(this)} onClickNext={this.gotoNext.bind(this)} currentImage={this.state.currentImage} isOpen={this.state.lightboxIsOpen}/> </div> ); } } |
Add getPhotos() method to our GalleryController to handle our /posts GET request.
|
1 2 3 4 |
public function getPhotos() { return response()->json(Auth::user()->photos->toArray()); } |
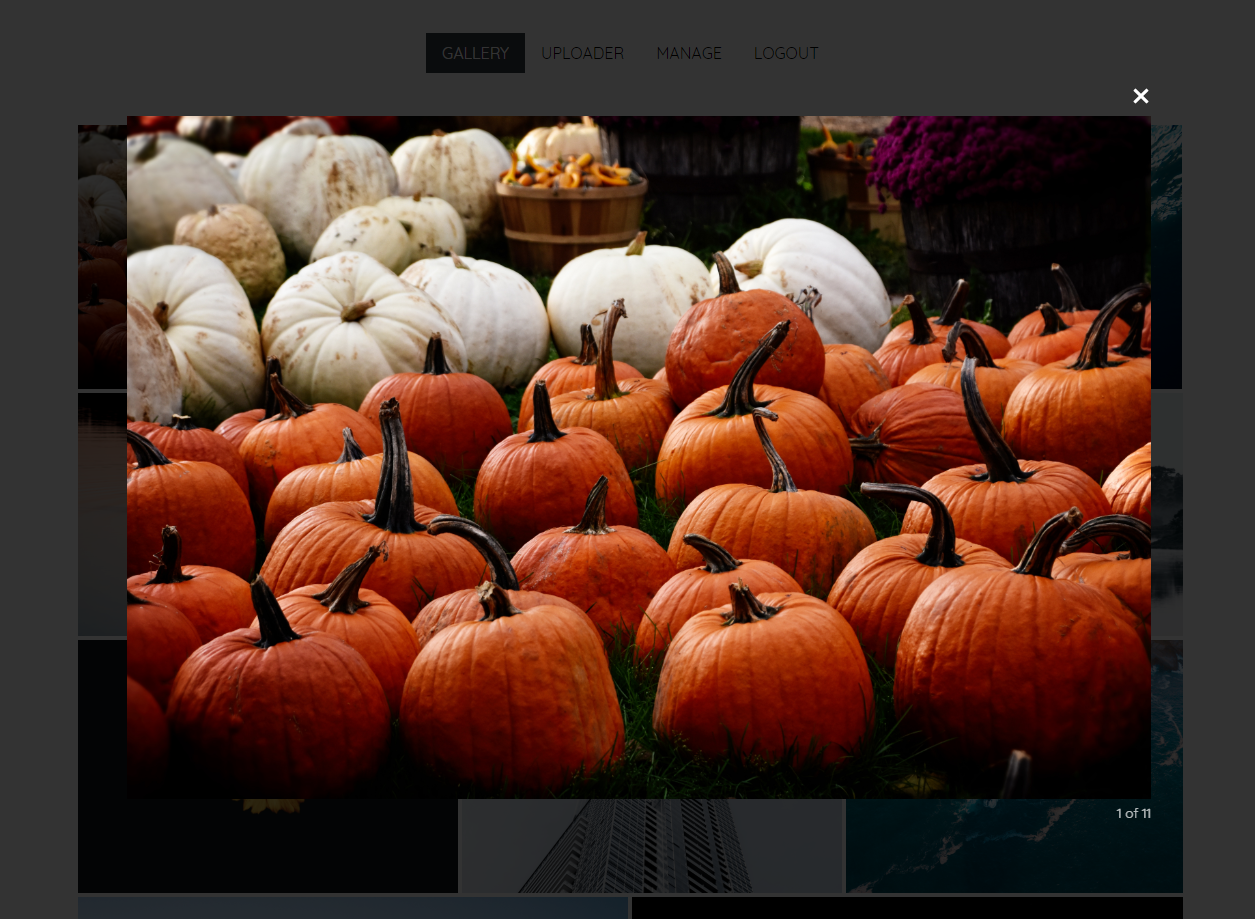
We are returning a JSON response with all images uploaded by the user. After getting a response, we are updating images state on Gallery component. We are using react-photo-gallery to render images and react-images Lightbox to display them in the overlay. We’re defining a few event handlers for Lightbox to handle close, next and previous events.
On click, Lightbox overlay will be displayed.
Managing Uploads
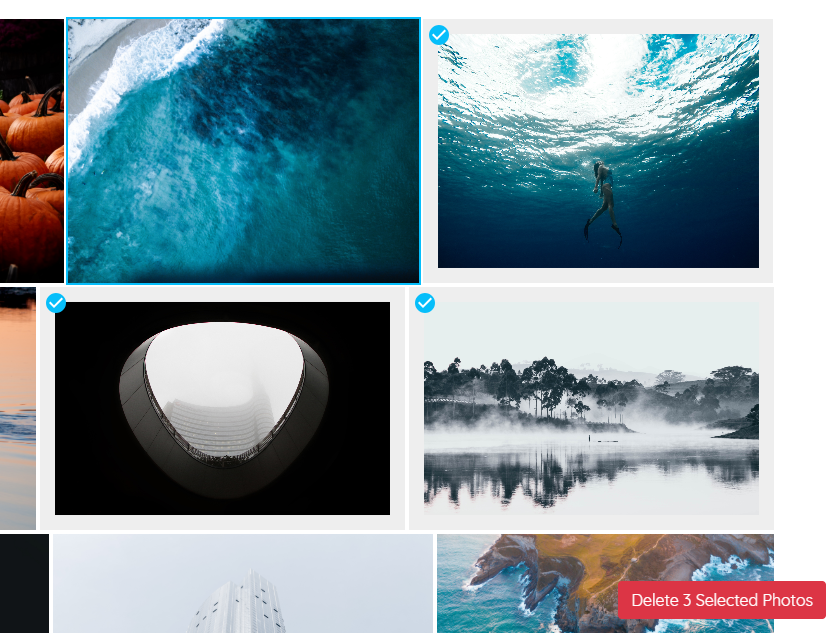
We have a separate component to manage uploaded images. ManageGallery has the same layout as Gallery component. The only difference is that it doesn’t display Lightbox overlay on click events. Instead, it lets you select images on click and delete them. Add ManageGallery component.
|
1 2 3 4 5 6 7 8 9 10 11 12 13 14 15 16 17 18 19 20 21 22 23 24 25 26 27 28 29 30 31 32 33 34 35 36 37 38 39 40 41 42 43 44 45 46 47 48 49 50 51 52 53 54 55 56 57 58 |
export default class ManageGallery extends Component { constructor(props){ super(props); this.state = { images: [], selectAll: false, selected : false, selected_count : true }; } componentDidMount(){ get('/photos') .then(response => { let images = response.data.map(image => { return { src : '/storage/' + image.uri, width : image.width, height : image.height, id : image.id } }); this.setState({ images : images }) }) } render() { return ( <div className="gallery"> {this.state.selected > 0 && <button className="btn btn-danger deleteBtn" onClick={this.deleteImages.bind(this)} > Delete {this.state.selected_count} Selected Photos </button> } {this.state.images.length ? <ReactGallery photos={this.state.images} onClick={this.selectImage.bind(this)} ImageComponent={SelectedImage} /> : <div className="no-images"> <h5 className="text-center"> You currently have no images in your photos gallery </h5> </div> } </div> ); } } |
In our ManageGallery component, we’ll mark the image as selected on click event. If there are marked images, we’ll display a delete button. Add this method to handle onClick events.
|
1 2 3 4 5 6 7 8 9 |
selectImage(event, obj) { let images = this.state.images; images[obj.index].selected = !images[obj.index].selected; this.setState({ images: images, } ,() => { this.verifyMarked(); }); } |
After updating state, we are calling verifyMarked in which we’ll calculate the total number of marked images and update selected and state on our component.
|
1 2 3 4 5 6 7 8 9 10 11 12 13 14 |
verifyMarked(){ let marked = false, mark_count = 0; this.state.images.map(image => { if(image.selected){ marked = true; mark_count += 1; } }); this.setState({ selected : marked, selected_count : mark_count }) } |
To handle delete button on click event, add this method.
|
1 2 3 4 5 6 7 8 9 10 11 12 13 14 15 16 17 18 19 20 21 22 |
deleteImages(e) { e.preventDefault(); let marked = this.state.images.filter(image => { return image.selected; }); marked.map(image => { axios.delete('/photos', { params : { id : image.id } }).then(response => { if(response.data.deleted){ this.setState({ images : this.state.images.filter(img => { return img.id !== image.id }) }); toastr.success('Images deleted from gallery'); } }) }) } |
We are filtering out marked images and then requesting DELETE /posts route to delete the image from database and storage. Add this method to your GalleryController to handle this request.
|
1 2 3 4 5 6 7 8 9 |
public function deletePhoto(Request $request) { $photo = Photos::find($request->id); if(Storage::disk('public')->delete($photo->uri) && $photo->delete()){ return response()->json([ 'deleted' => true ]); } } |
After deleting the file from public storage, we’ll remove the record from the database and return a success response. On the frontend, we’ll remove deleted images from components local state.
Here’s a working demo of our app. If you’ve been following this tutorial from the start, you should be able to implement it without any problem. Still, if you’ve any issue or questions, please leave a comment and I’ll try to help. Here’s a Github repository link. Clone and run npm install && npm run watch to give it a try.
Can the templates be separated into files? It’s really messy to include the HTML inside the Javascript.
Not really. This is how you write React with JSX.
Your tutorials are fantastic! My thanks for taking the time to create and publish them to your blog for us. The only problem with this one I had was the instructions are missing the removeDroppedFile method in the Uploader component, which causes an error when you “select images”.
Again thank you so much. I hope you keep writing these.
Thank you for pointing that out. I’ve updated the tutorial. Sometimes I omit few details in my tutorials. In such cases, please check linked GitHub repositories for complete code.
Thanks for such a wonderful insight into the topic. Meanwhile, can you please let me know how do I serve the image data to the user. Complete sharing of the project would help.
Regards
How to we show all the images to none users without authorization?
it doesnt working, the images doest load, help!
Create a symbolic link from storage to public directory by running.
php artisan storage:link